Rror in Pycharm Configuration Is Still Incorrect Do You Want to Edit It Again
When you lot run, debug, or examination your code, Android Studio uses a run/debug configuration to determine how to perform the performance. Typically, the default configuration is sufficient to run or debug an app. However, y'all tin modify and create new configurations, and modify the default templates to adjust your development process every bit described on this folio.
For more information, likewise see the following IntelliJ documentation:
- Run/Debug Configurations
- Creating and Editing Run/Debug Configurations
About run/debug configurations
Run/debug configurations specify details such equally app installation, launch, and examination options. You can define a configuration for old utilize, or relieve it for future employ. Later on you lot save it, you lot can select the configuration from the Select Run/Debug Configuration drop-downward list within the toolbar. Android Studio saves configurations as office of the project.
Default run/debug configuration
When you first create a projection, Android Studio creates a default run/debug configuration for the main activity based on the Android App template. To run or debug your project, you must always have at least one run/debug configuration defined. For this reason, nosotros recommend that yous don't delete the default configuration.
Projection telescopic and version control
Run/debug configurations and template changes apply to the electric current projection only. You can share a run/debug configuration (but not a template) through your version command system. For more data near how to share a configuration, see Name and Share Configuration Options.
Open up the Run/Debug Configurations dialog
To open the Run/Debug Configurations dialog, select Run > Edit Configurations. The Run/Debug Configurations dialog appears, as shown in effigy 1.

Figure 1. The Run/Debug Configurations dialog
The dialog displays default templates in the left console under the Defaults folder, and groups your divers configurations by template blazon above the Defaults folder. You can resize the dialog to see whatever hidden items.
In this dialog, you can:
- Create new run/debug configurations.
- Edit run/debug configurations.
- Edit default templates.
- Sort and group configurations.
Create a new run/debug configuration
Y'all can define new run/debug configurations from the Run/Debug Configurations dialog, the Projection window, or the Code Editor. The new configuration must be based on a default template.
The Run/Debug Configurations dialog displays your run/debug configurations and the bachelor default templates. You tin start a new configuration direct from a template, or from a re-create of another configuration. Yous can then change the field values as needed.
Alternatively, yous can correct-click an item in the Project window to automatically create a configuration specific to that particular. For example, if you want to run a particular activity, yous can correct-click the activity Coffee file and select Run. Depending on the item, Android Studio uses an Android App, Android Instrumented Tests, or Android JUnit default template to create the configuration.
In the Lawmaking Editor, you tin hands create a test and run/debug configuration for a grade or method, and so execute it.
When you create a configuration exterior of the Run/Debug Configurations dialog, the configuration is temporary unless you salvage it. By default, yous tin can have upwards to five temporary configurations in the projection earlier Android Studio starts to remove them. To change this default, in the Run/Debug Configurations dialog, click the Defaults folder and type a value in the Temporary Configurations Limit field. For more information near temporary configurations, run into Creating and Saving Temporary Run/Debug Configurations.
Offset a configuration based on a template
To ascertain a run/debug configuration based on a template, follow these steps:
- Open up the Run/Debug Configurations dialog.
- Click Add New Configuration
 .
. - Select a default template.
- Type a proper name in the Name field.
- Modify the configuration, as needed.
- Click Apply or OK.
Be sure to correct any errors displayed at the bottom of the dialog.
Kickoff a configuration from a copy
To define a run/debug configuration starting from a copy of some other configuration, follow these steps:
- Open the Run/Debug Configurations dialog.
- Select an existing run/debug configuration in the left pane.
- Click Copy Configuration
 .
. - Type a proper name in the Proper noun field.
- Modify the configuration, equally needed.
- Click Employ or OK.
Exist sure to correct any errors displayed at the lesser of the dialog.
Define a configuration for an item in the project
Android Studio can create a run/debug configuration for some items displayed in the Project window. The configuration is based on a default template, as follows:
- Activeness Coffee file: The Android App template.
- Parcel: Android Instrumented Tests or Android JUnit template, depending on your source set. If y'all select an instrumented test, then it uses the Android Instrumented Tests template. If you lot select a local unit of measurement test, then it uses the Android JUnit template. For a local unit of measurement test, you can optionally run with code coverage. For more than information, see Code Coverage.
To create a run/debug configuration for an particular in your projection, follow these steps:
- Open up a projection in Android or Project view.
- In the Project window, right-click a testable detail and select either Run filename or Debug filename . Android Studio creates a temporary run/debug configuration and launches your app.
- Select Relieve from the Select Run/Debug Configuration drop-downward list in the toolbar. If y'all do non come across the toolbar, select View > Toolbar.
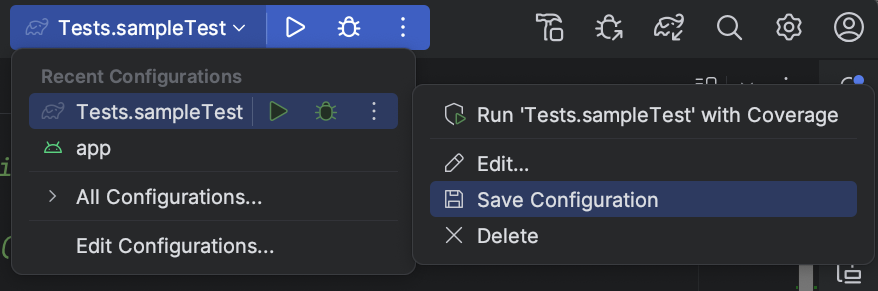
Effigy 2. Save the configuration
Annotation: If you right-click and run or debug the aforementioned item (but non an activity), Android Studio creates a new configuration.
Define a test configuration for a class or method
Android Studio lets you lot define a examination run configuration for a form or method, then execute it. For example, if yous create a new class, you can create and run a test for it. If the test passes, you can then run the tests for the rest of the projection to brand sure that your new code doesn't break anything somewhere else.
Android Studio uses the Android Instrumented Tests or Android JUnit template, depending on your source fix. For a local unit of measurement examination, you can optionally run with code coverage.
To create a run/debug configuration for a form or method in your Java code, follow these steps:
- Open a projection in Android or Project view.
- Open up a Java file in the Code Editor.
- Select a class or method in the code, and then press Control+Shift+T (Command+Shift+T).
- Select Create New Test from the carte that appears.
- In the Create Test dialog, optionally change or ready the values and click OK.
- In the Cull Destination Directory dialog, select where in the project you desire Android Studio to identify the examination. You can specify the location by directory structure or past selecting a neighboring course.
- Click OK.
The new test appears in the Project window in the respective test source set.
- To run the test, do one of the following:
- In the Project window, correct-click the examination and select Run or Debug.
- In the Code Editor, right-click a class definition or method name in the examination file and select Run or Debug to exam all methods in the grade.
- Select Salve from the Select Run/Debug Configuration drop-down list in the toolbar.
Figure 3. Save the configuration
Run or debug an app using a saved configuration
If you've saved a run/debug configuration, yous tin select information technology before you run or debug your app.
To use a saved run/debug configuration, follow these steps:
- Select the run/debug configuration from the Select Run/Debug Configuration drib-down list within the toolbar.
- Select Run > Run or Run > Debug.
The drop-down list is to the left of Run  and Debug
  ; for case,
  .
.
Alternatively, click Run or Debug .
Edit a run/debug configuration
To edit a run/debug configuration, follow these steps:
- Open the Run/Debug Configurations dialog.
- Select a configuration in the left pane.
- Modify the configuration, as needed.
- Click Utilise or OK.
Be certain to correct whatever errors displayed at the lesser of the dialog.
Edit a default run/debug configuration template
You can edit the default templates provided by Android Studio to accommodate your development process. When you edit a template, it doesn't affect existing configurations that utilize the template. And then, for example, if y'all demand to create a number of configurations of a certain type, you lot can edit the template and so alter information technology back when you lot're done.
Although you tin't create new templates, you lot can create configurations to use like to a template. You can copy a configuration and edit the copy to create new configurations.
To edit a template, follow these steps:
- Open up the Run/Debug Configurations dialog.
- Expand the Defaults binder and select a default template.
- Alter the configuration, every bit needed.
- Click Use or OK.
Be sure to correct any errors displayed at the bottom of the dialog.
Sort and grouping configurations
In the Run/Debug Configurations dialog, you can social club your configurations to find them chop-chop. You can sort the items in the folder alphabetically, and create new folders to group configurations.
To sort configurations alphabetically, follow these steps:
- Open up the Run/Debug Configurations dialog.
- Select a binder that contains configurations.
- Click Sort Configurations
 .
. - Click Apply or OK.
To group configurations in folders, follow these steps:
- Open the Run/Debug Configurations dialog.
- Select a folder that contains configurations.
- Click Create New Folder
 .
. - Blazon a name in the Folder Proper name field.
- Drag items from the aforementioned template category into the binder.
- Order the folders and configurations in the same template category by dragging them into position or by using Move Upwardly
 and Motility Downwardly
  .
. - Click Employ or OK.
Define before-launch operations
You can specify tasks to execute before applying the run/debug configuration. The tasks are performed in the guild they appear in the list.
Note: Defining before launch tasks is an avant-garde feature. Instead of using this feature, nosotros recommend that yous put any preparation logic as tasks in your build.gradle file and so they'll be executed when you lot build from the command line.
To create a task list, follow these steps:
- At the bottom of the Run/Debug Configurations dialog under Before launch, click Add and select a task type. If a dialog opens, fill in the fields and click OK.
- Add together more tasks as needed.
- To order the tasks, select a task and click Upwards and Down to move information technology up or down in the list.
- Select Show this page if you want to display the run/debug configuration settings before applying them.
This choice is deselected by default.
- Select Active tool window if you desire the Run or Debug tool window to exist activated when you run or debug your app.
This option is selected by default.
To remove a task from the list, follow these steps:
- Select a job.
- Click Remove
 .
.
To edit a chore, follow these steps:
- Select a task.
- Click Edit
 .
. - Edit the job settings in the dialog that opens, and and so click OK.
The following table lists the available tasks you can add.
| Task | Clarification |
|---|---|
| Run External tool | Run an application that's external to Android Studio. In the External Tools dialog, select i or more applications that you want to run and and then click OK. If the application isn't defined in Android Studio yet, add its definition in the Create Tools dialog. For more information, see Configuring 3rd-Party Tools and External Tools. |
| Run Another Configuration | Execute one of the existing run/debug configurations. In the Choose Configuration to Execute dialog, select a configuration to execute and and then click OK. |
| Brand | Compile the project or the module. Android Studio executes the Make Module command if the run/debug configuration specifies a detail module, or information technology executes the Make Project command if no modules are specified. |
| Make Project | Compile the project. Android Studio executes the Make Projection command. |
| Make, no mistake cheque | This option is the same equally Make, except that Android Studio executes the run/debug configuration irrespective of the compilation result. |
| Build Artifacts | Unsupported in Android Studio. |
| Run Gradle task | Run a Gradle task. In the dialog that opens, specify the details and then click OK. For more information, see Gradle. |
| Gradle-enlightened Make | Compile the project and run Gradle. |
| App Engine Gradle architect | The App Engine Gradle architect task syncs the project and and so builds the module. |
Default run/debug configuration templates
Android Studio provides default configuration templates to help you lot get started quickly. The post-obit sections describe the templates that employ to Android development with Android Studio:
- Android App
- Android Tests
- App Engine DevAppServer
Note: Android Studio ii.1.10 and lower had a Native Awarding template, which newer versions don't have. If you lot have a Native Application template in a projection, Android Studio converts it to Android App when you load the project. A Convert Project dialog guides you through the procedure.
Unsupported templates
The post-obit unsupported templates come from IntelliJ IDEA and aren't specific to Android development with Android Studio. For information well-nigh using these templates, follow the links to the IntelliJ Thought documentation.
- Application
- Compound
- Gradle
- Groovy
- JAR Application
- JUnit Test Discovery
- Coffee Scratch
- Remote
- TestNG
- TestNG Exam Discovery
Proper noun and Share configuration options
The Proper name and Share options utilise to configurations only. When you create a configuration, give it a name, and if you lot want to share the configuration, check the Share checkbox. You cannot proper noun and share a template.
Use the Share checkbox to brand the run/debug configuration bachelor to other team members through version control. If you select this selection, when the project is checked into a version control system, the run/debug configuration is included when someone checks the project out.
Android Studio stores the shared run/debug configuration in individual XML files under the project_directory/.thought/runConfigurations/ folder. For more data, see Directory-based Projection Format.
Android App
You tin run or debug Android apps and activities on virtual or hardware devices by using configurations based on this template.
Full general tab
In the Full general tab, you can specify installation, launch, and deployment options. The Miscellaneous tab too contains installation options.
| Field | Description |
|---|---|
| Module | Select a module to apply this configuration to. |
| Installation Options: Deploy | Select an option:
|
| Installation Options: Deploy as instant app | If your app supports instant experiences—that is, you lot either add support for instant apps when you create a new projection, or you lot create one or more instant-enabled feature modules—you lot can cull to deploy those instant-enabled modules by checking the box next to Deploy as instant app. |
| Installation Options: Features to deploy | If your app includes feature modules, check the box side by side to each feature y'all want to include when deploying your app. You see this option only if your app includes feature modules. Annotation: If y'all want to exam downloading and installing feature modules on demand, you lot must do and so afterward you publish your app parcel and and then apply the Play Panel internal test track. To learn more, read Upload your app bundle to the Play Console. |
| Installation Options: Install Flags | Type any adb pm install options y'all want to employ. Format the options the aforementioned style that you would on the command line, only without a path. Here are some examples: and Default: no options. |
| Launch Options: Launch | Select an option:
|
| Launch Options: Launch Flags | Blazon whatsoever adb am start options you desire to utilize. Format the options the aforementioned way that you would on the command line, simply without an intent. For instance: This option doesn't appear if you chose a Launch value of Nothing. Default: no options. |
| Deployment Target Options: Target | Select an pick:
|
| Deployment Target Options: Use same device for future launches | Past default this selection is deselected so that every time you lot run an app, the Select Deployment dialog appears for yous to select a device. When yous select this option and so run an app, the Select Deployment dialog appears for you to select a device. Then, every time y'all run the app, it launches on the device you selected without displaying the Select Deployment dialog. To run the app on a different device, either deselect Use same device for future launches, or stop the app with Run > Stop app or Stop  , and then start it again. The Select Deployment dialog will display and then you can select a device. , and then start it again. The Select Deployment dialog will display and then you can select a device. |
| Before Launch | See Defining Before Launch Operations. |
Miscellaneous tab
In the Miscellaneous tab, y'all can specify logcat, installation, launch, and deployment options. The General tab as well contains installation options.
| Field | Description |
|---|---|
| Logcat: Show logcat automatically | When this option is selected, the Logcat window opens every time you lot successfully deploy and launch an app using this configuration. Default: selected. |
| Logcat: Clear log earlier launch | Select this option if you lot desire Android Studio to remove data from previous sessions from the log file earlier starting the app. Default: deselected. |
| Installation Options: Skip installation if APK has not changed. | When selected, Android Studio doesn't redeploy your APK if information technology detects that it'due south unchanged. If you want Android Studio to force an install of the APK, even if it hasn't changed, and so deselect this choice. Default: selected |
| Installation Options: Strength stop running application before launching activity | If selected, when Android Studio detects that it doesn't have to reinstall an APK considering it hasn't changed, it volition forcefulness-finish the app then that the app starts from the default launcher activity. If this choice is deselected, Android Studio doesn't strength-stop the app. This option works with the previous option that controls whether an APK is installed or non. For both Installation Options fields, get out them at the default unless y'all explicitly want to force an install every time. In some cases yous might want to deselect this option. For example, if you lot're writing an input method engine (IME), force-stopping the app deselects it as the current keyboard, which yous might not want. Default: selected |
| Before Launch | See Defining Before Launch Operations. |
Debugger tab
Specify debug options in the Debugger tab.
For C and C++ code, Android Studio uses the LLDB debugger. In improver to the normal Android Studio UI, the debugger window has an LLDB tab that lets y'all enter LLDB commands during debugging. You can enter the aforementioned commands that Android Studio uses to display information in the debugger UI, and you can perform additional operations.
For C and C++ projects, you can add symbol directories, equally well as LLDB startup and mail attach commands, in the Debugger tab. To do so, you employ buttons similar to the following:
See Debug Your App for more information near debugging in Android Studio.
| Field | Description |
|---|---|
| Debug type | Select ane of the following options:
The Auto selection is recommended considering it chooses the right debug type for your project. |
| Symbol Directories | If you lot want to add symbol files to provide the debugger with C or C++ information generated outside of Android Studio, you lot can add together one or more than directories here. Android Studio preferentially uses any files inside these directories over files generated past the Android Plugin for Gradle. The debugger searches the directories from top to bottom, in order, until it finds what it needs. It searches recursively through the files in the directory. To optimize the list and salvage time, put the directories used virtually ofttimes toward the pinnacle of the listing. If you lot specify a directory high in the tree, it can take longer to search all of the subdirectories. If you add a very specific directory, it takes less fourth dimension to search. You need to discover the right rest betwixt speed and finding the files you need for debugging. For example, if you have a directory that contains subdirectories for different Android Binary Interfaces (ABIs), you lot can choose to add together a directory for a specific ABI or for all ABIs. Although information technology can accept longer to search through the upper-level directory, information technology'due south likewise more foolproof if you lot make up one's mind to debug on a different device. Notation that you don't have to add directories containing Gradle symbol files because the debugger uses them automatically. |
| LLDB Startup Commands | Add LLDB commands that you want to execute before the debugger attaches to the process. For case, you lot can define settings for the environment, as shown in the following command: LLDB executes the commands in order from acme to lesser. |
| LLDB Post Attach Commands | Add LLDB commands that you want to execute correct after the debugger attaches to the process. For instance: LLDB executes the commands in society from top to lesser. |
| Host working directory | Specify the LLDB working directory. |
| Logging: Target channels | Specify LLDB log options. Android Studio sets the default options based on the team's experience — so it's not besides slow just contains needed information for troubleshooting issues. The log is ofttimes requested for Android Studio bug reports. This default is Yous can modify the default to gather more than data. For example, the following log options assemble information virtually a specific lldb procedure platform:gdb-remote packets For a complete list of log commands, enter the Android Studio places device logs in the following location, where Or, if multiple users access a device, information technology places the logs in the following location, where For information almost using LLDB for remote debugging, see Remote Debugging. |
| Before Launch | Run into Defining Before Launch Operations. |
Profiling tab
The Enable advanced profiling option must exist checked to enable certain features in the Android Profiler when your device is running Android 7.i or lower.
Android Tests
The test template that you should use depends on your source set. The Android Instrumented Tests template is for an instrumented test. The Android JUnit template is for a local unit of measurement examination.
Note: If you're using Firebase Exam Lab to exam on a variety of devices, you tin utilise the Android JUnit template to ascertain your instrumented tests. For more information, see Run Your Tests with Firebase Test Lab.
The following tab descriptions cover the tabs and fields for the Android Instrumented test template. For data about the tabs and fields for the Android JUnit examination template, run across the IntelliJ Run/Debug Configuration: JUnit page.
General tab
In General tab, you lot can specify test location, instrumentation runner, adb shell, and deployment options.
| Field | Description |
|---|---|
| Module | Select a module to apply this configuration to. |
| Examination | In this expanse, specify the location of tests that you want to run:
|
| Specific instrumentation runner (optional) | Type the location of the instrumentation runner; click More to use a dialog. The build.gradle file specifies the location of the instrumentation runner; this value overrides it. The default is typically the AndroidJUnitRunner class from AndroidX Exam. |
| Extra options | Type any adb Default: no options |
| Deployment Target Options: Target | Select an selection:
|
| Deployment Target Options: Use aforementioned device for future launches | If you lot desire to automatically utilize the device you chose through the Select Deployment Target dialog in the time to come, select this option. If the device isn't bachelor, y'all'll receive a dialog. Default: deselected |
| Earlier Launch | Come across Defining Earlier Launch Operations. |
Miscellaneous tab
The Miscellaneous tab contains logcat and installation options.
| Field | Description |
|---|---|
| Logcat: Articulate log before launch | Select this option if y'all want Android Studio to remove information from previous sessions from the log file before starting the app. Default: deselected. |
| Installation Options: Skip installation if APK has not changed | When selected, Android Studio doesn't redeploy your APK if information technology detects that information technology'southward unchanged. If you want Android Studio to force an install of the APK, even if it hasn't changed, then deselect this pick. Default: selected |
| Installation Options: Force stop running awarding earlier launching action | If selected, when Android Studio detects that it doesn't accept to reinstall an APK because it hasn't changed, it will force-terminate the app so that the app starts from the default launcher action. If this option is deselected, Android Studio doesn't force-stop the app. This choice works in conjunction with the previous option that controls whether an APK is installed or not. For both Installation Options fields, leave them at the default unless yous explicitly want to force an install every time. In some cases you might want to deselect this selection. For example, if you're writing an input method engine (IME), strength-stopping the app deselects information technology as the current keyboard, which y'all might not want. Default: selected |
| Before Launch | See Defining Earlier Launch Operations. |
Debugger tab
Specify debug options in the Debugger tab.
For C and C++ code, Android Studio uses the LLDB debugger. In add-on to the normal Android Studio UI, the debugger window has an LLDB tab that lets you enter LLDB commands during debugging. You tin enter the aforementioned commands that Android Studio uses to display information in the debugger UI, and you can perform additional operations.
For C and C++ projects, you can add symbol directories, as well as LLDB startup and post attach commands, in the Debugger tab. To do and so, yous utilize buttons like to the following:
See Debug Your App for more information about debugging in Android Studio.
| Field | Clarification |
|---|---|
| Debug type | Select ane of the following options:
The Auto selection is recommended because it chooses the correct debug type for your projection. |
| Symbol Directories | If you want to add symbol files to provide the debugger with C or C++ information generated outside of Android Studio, you can add together one or more directories here. Android Studio preferentially uses any files within these directories over files generated by the Android Plugin for Gradle. The debugger searches the directories from summit to bottom, in order, until information technology finds what it needs. It searches recursively through the files in the directory. To optimize the list and relieve time, put the directories used most often toward the peak of the list. If you specify a directory high in the tree, it tin accept longer to search all of the subdirectories. If y'all add a very specific directory, information technology takes less time to search. Yous demand to notice the correct balance between speed and finding the files you need for debugging. For example, if you lot accept a directory that contains subdirectories for different Android Binary Interfaces (ABIs), you lot can choose to add a directory for a specific ABI or for all ABIs. Although information technology tin accept longer to search through the upper-level directory, it'southward also more foolproof if yous make up one's mind to debug on a unlike device. Annotation that you don't have to add together directories containing Gradle symbol files considering the debugger uses them automatically. |
| LLDB Startup Commands | Add LLDB commands that you want to execute before the debugger attaches to the process. For example, you can ascertain settings for the environment, as shown in the following command: LLDB executes the commands in order from top to bottom. |
| LLDB Post Attach Commands | Add LLDB commands that you want to execute right later the debugger attaches to the process. For example: LLDB executes the commands in order from top to bottom. |
| Host working directory | Specify the LLDB working directory. |
| Logging: Target channels | Specify LLDB log options. Android Studio sets the default options based on the squad'due south experience — and so information technology's not also deadening just contains needed information for troubleshooting issues. The log is frequently requested for Android Studio issues reports. This default is You lot can modify the default to gather more information. For case, the following log options gather information about a specific lldb procedure platform:gdb-remote packets For a complete list of log commands, enter the Android Studio places device logs in the following location, where Or, if multiple users access a device, information technology places the logs in the post-obit location, where For information about using LLDB for remote debugging, see Remote Debugging. |
| Earlier Launch | See Defining Earlier Launch Operations. |
App Engine DevAppServer
This run/debug configuration applies to the Google Cloud Platform. For more information, meet Running, Testing, and Deploying the Backend. When y'all follow these steps and sync your project to the build.gradle file, Android Studio creates an App Engine DevAppServer configuration for you lot.
Annotation that the IntellJ IDEA App Engine Server template is a different template that'southward not bachelor in Android Studio.
| Field | Description |
|---|---|
| Single instance just | If you want to make sure that just one example of the run/debug configuration is currently executed, select this selection. It doesn't let multiple runs of the same configuration at the same time. Default: selected |
| Module | Select a module to apply this configuration to. |
| Synchronize with build.gradle configuration | If y'all add an App Engine module and sync to the build.gradle file, the App Engine DevAppServer configuration fields are filled in for you (recommended). Selecting File > Sync Project with Gradle Files also syncs the projection. Default: selected |
| App Engine SDK | Blazon a path to a Google App Engine SDK for Java on the local machine. Click ... to select it from a dialog. |
| War Path | Type a path to the Web Application Archive (WAR) directory of the app you're deploying on the local development server. Click ... to select it from a dialog. |
| VM Args | Specify the command-line options you want to pass to the VM for launching the DevAppServer. When specifying the options:
For more information about VM options, see the documentation for your J2SE version, such as Default: no options |
| Server Accost | Type the host address to use for the server. Y'all might need to provide the address to be able to access the evolution server from another computer on your network. An address of 0.0.0.0 allows both localhost access and hostname admission. Default: localhost |
| Server Port | Type the port number to utilize for the server. Default: 8080 |
| Disable Check for App Engine SDK Updates | If given, the development server volition not contact App Engine to check for the availability of a new release of the SDK. By default, the server checks for a new version on startup, and prints a message if a new version is available. |
| Before Launch | See Defining Before Launch Operations. |
Source: https://developer.android.com/studio/run/rundebugconfig
0 Response to "Rror in Pycharm Configuration Is Still Incorrect Do You Want to Edit It Again"
Post a Comment